기초가이드 웹 응용 프로그램에 React Excel XLSX 뷰어를 추가하는 방법
페이지 정보
작성자 GrapeCity 작성일 2023-08-01 13:31 조회 342회
댓글 0건
작성일 2023-08-01 13:31 조회 342회
댓글 0건
본문
첨부파일
관련링크
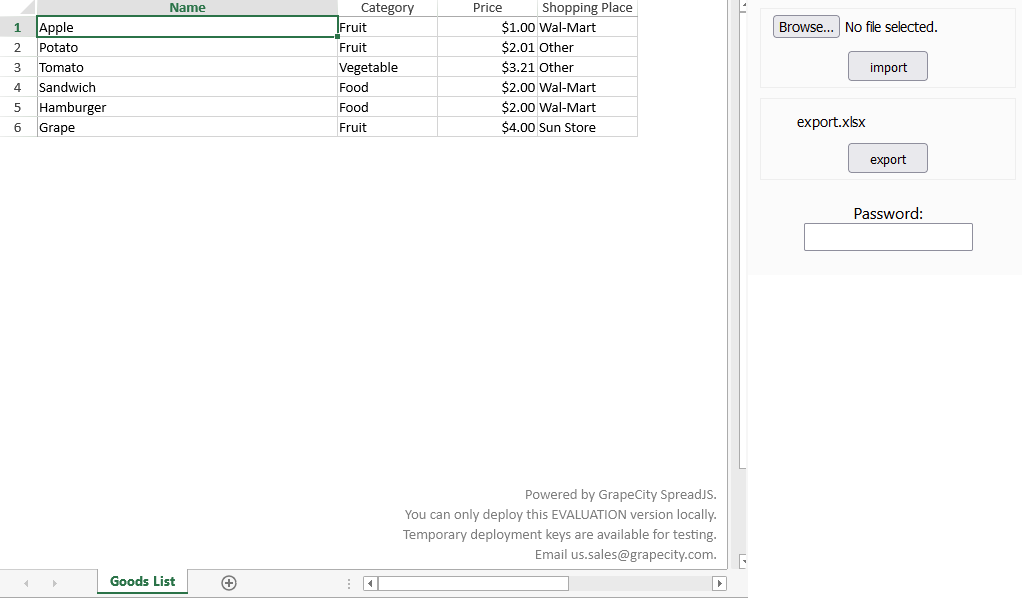
매우 복잡한 XLSX 스프레드시트 파일을 읽어오기, 편집, 저장할 수 있는 유용한 클라이언트 측 컨트롤입니다.
원활한 진행을 위해 샘플을 다운로드해 주세요.
새 프로젝트 만들기
먼저 터미널을 사용하여 새 프로젝트를 만들어야 합니다.
npm init react-app spreadjs-react-app
cd spreadjs-react-app
NPM을 사용하여 프로젝트에 SpreadJS를 추가합니다.
npm install @grapecity/spread-sheets @grapecity/spread-sheets-react @grapecity/spread-excelio
다음으로, FileSaver 라이브러리를 설치해야 합니다.
npm install file-saver
이제 이 응용 프로그램에 SpreadJS 코드를 추가할 수 있습니다.
SpreadJS 코드 추가
먼저 필수 라이브러리를 src>App.js 파일의 컴포넌트로 가지고 와야 합니다.
import './App.css';
import React, { Component } from 'react';
import * as GC from '@grapecity/spread-sheets';
import { SpreadSheets, Worksheet, Column } from '@grapecity/spread-sheets-react';
import { IO } from "@grapecity/spread-excelio";
import '@grapecity/spread-sheets/styles/gc.spread.sheets.excel2013white.css';
import saveAs from 'file-saver';
이제 필요한 항목을 모두 가져왔습니다! 변수를 정의할 생성자로 시작하는 컴포넌트 코드를 만들고, SpreadJS 인스턴스를 초기화할 수 있습니다.
class App extends Component {
constructor(props) {
super(props);
this.spread = null;
this.spreadBackColor = 'aliceblue';
this.sheetName = 'Goods List';
this.hostStyle = {
width: '100%',
height: '600px',
border: '1px solid darkgray'
};
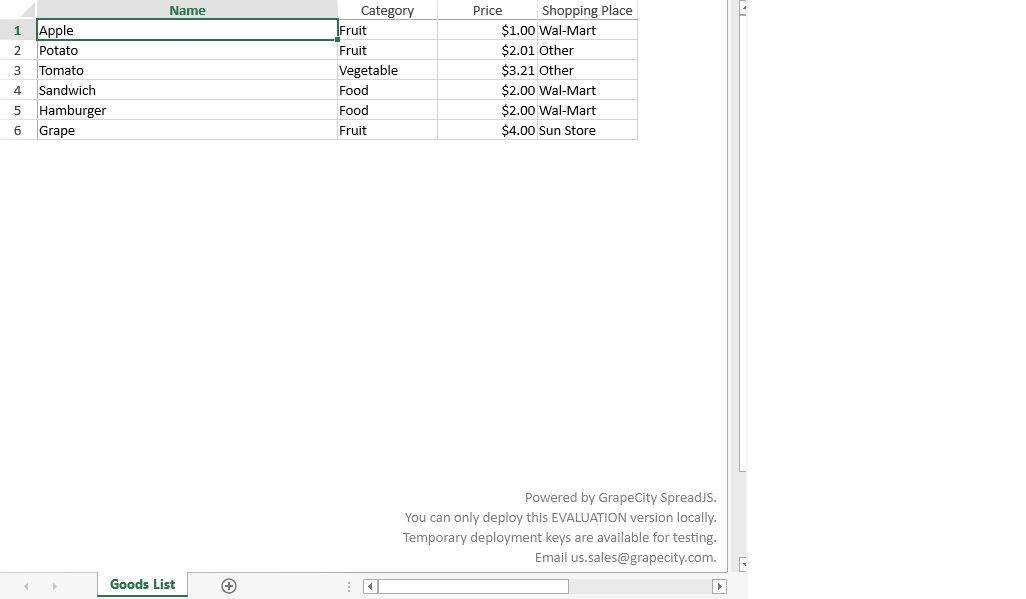
this.data = [
{
Name: "Apple",
Category: "Fruit",
Price: 1,
"Shopping Place": "Wal-Mart",
},
{
Name: "Potato",
Category: "Fruit",
Price: 2.01,
"Shopping Place": "Other",
},
{
Name: "Tomato",
Category: "Vegetable",
Price: 3.21,
"Shopping Place": "Other",
},
{
Name: "Sandwich",
Category: "Food",
Price: 2,
"Shopping Place": "Wal-Mart",
},
{
Name: "Hamburger",
Category: "Food",
Price: 2,
"Shopping Place": "Wal-Mart",
},
{
Name: "Grape",
Category: "Fruit",
Price: 4,
"Shopping Place": "Sun Store",
},
];
this.columnWidth = 100;
this.importExcelFile = null;
this.exportFileName = "export.xlsx";
this.password = "";
}
initSpread(spread) {
this.spread = spread;
spread.options.calcOnDemand = true;
}
}웹페이지 상 표시할 내용에 대한 렌더 함수를 추가합니다.
render() {
 return (
   <div className="App">
     <div class="sample-spreadsheets">
       <SpreadSheets workbookInitialized={spread => this.initSpread(spread)}  hostStyle={this.hostStyle}>
         <Worksheet name="Goods List" dataSource={this.data}>
           <Column dataField='Name' width={300}></Column>
           <Column dataField='Category' width={100}></Column>
           <Column dataField='Price' width={100} formatter="$#.00"></Column>
           <Column dataField='Shopping Place' width={100}></Column>
         </Worksheet>
       </SpreadSheets>
     </div>
   </div>
)
}
응용 프로그램을 실행하려면 명령줄에 npm start를 사용하세요.
그러면 웹 브라우저에서 열리게 됩니다.
Excel 가져오기/내보내기 코드 추가
이제 SpreadJS 인스턴스가 설정되어, ExcelIO 코드를 추가할 수 있습니다.
이 작업은 전과 동일한 App.js 파일에서 실행할 수 있습니다.
SpreadJS 요소 바로 아래 UI를 위한 버튼 몇 개를 추가해 보겠습니다.
<div className="options-container">
 <div className="option-row">
   <div className="inputContainer">
     <input type="file" id="fileDemo" className="input" accept=".xlsx" onChange={e=>this.changeFileDemo(e)}/>
     <input type="button" id="loadExcel" defaultValue="import" className="button" onClick={e=>this.loadExcel(e)}/>
   </div>
   <div className="inputContainer">
     <input id="exportFileName" defaultValue="export.xlsx" className="input" onChange={e=>this.changeExportFileName(e)}/>
     <input type="button" id="saveExcel" defaultValue="export" className="button" onClick={e=>this.saveExcel(e)}/>
   </div>
 </div>
 <div className="option-row">
   <div className="group">
       <label>Password:
         <input type="password" id="password" onChange={e=>this.changePassword(e)}/>
       </label>
   </div>
 </div>
</div>
버튼에 대한 함수를 추가하겠습니다.
changeFileDemo(e) {
this.importExcelFile = e.target.files[0];
}
changePassword(e) {
this.password = e.target.value;
}
changeExportFileName(e) {
this.exportFileName = e.target.value;
}이제 SpreadJS에 Excel 파일을 로드하기 위한 코드를 추가하겠습니다. 열 때 암호를 활용할 수 있습니다.
loadExcel(e) {
let spread = this.spread;
let excelIo = new IO();
let excelFile = this.importExcelFile;
let password = this.password;
excelIo.open(excelFile, function (json) {
let workbookObj = json;
spread.fromJSON(workbookObj);
}, function (e) {
alert(e.errorMessage);
}, { password: password });
}암호(선택 사항)를 사용하여 Excel 파일을 저장할 수 있습니다.
이 경우 데이터 바인딩 통합 문서를 위한 includeBindingSource 옵션이 필요합니다.
saveExcel(e) {
let spread = this.spread;
let excelIo = new IO();
let fileName = this.exportFileName;
let password = this.password;
if (fileName.substr(-5, 5) !== '.xlsx') {
fileName += '.xlsx';
}
let json = spread.toJSON({includeBindingSource: true});
excelIo.save(json, function (blob) {
saveAs(blob, fileName);
}, function (e) {
console.log(e);
}, { password: password });
}
이로써 React 응용 프로그램에서 SpreadJS를 사용하여 Excel 스프레드시트 뷰어를 만드는 데 필요한 모든 단계가 완료되었습니다!
지금 바로 SpreadJS를 다운로드하여 직접 테스트해 보세요!

댓글목록
등록된 댓글이 없습니다.